Create an Awesome 3D Slideshow With Cu3er: Part 2
Today we’re going to finish up our two-part cu3er tutorial.
For those who don’t know, Cu3er is an awesome 3D image slider that’s free to use and easy to setup.This section will examine how to tweak your slideshow using some of Cu3er’s many customization options. We’ll mostly be editing an XML page but don’t worry about it getting too techie. Even if you don’t know what XML is, it’s all pretty straightforward and easy to understand.
Previously on Design Shack
In part 1 of the Cu3er tutorial, we downloaded Cu3er and modified the example page to see how easy it is to incorporate the slideshow into your designs.Before we get started, you might want to check out the demo and download the source files.
The Config File
If you followed along last time your config.xml file should be untouched from the original file we downloaded from the cu3er website.The demo and associated files above have been altered slightly to include an auto-start feature but today we’ll start back at the default file just to have a clean slate.
Get your example ready to go and open the config file and we’ll get started! There should only be two sections in this file: settings and slides. By default, the settings section contains only the code for the previous and next buttons to navigate the slideshow. Feel free to play with or eliminate these settings on your own, but we’ll leave them as is because I like having the ability to manually navigate the slideshow.
Auto Start
By default, the Cu3er slideshow is static and won’t change images until you click the next button. However, there are plenty of instances where you might want the slideshow to just run automatically when the page loads.To accomplish this, copy and past the following code from the Cu3er documentation into the settings section of your XML file.
The first part of this code controls how long the timer is on each slide and what it looks like. You have two options here: linear or circular. The circular option is a pie chart that fills up gradually and the linear option is a rectangle with a horizontal sweep. The time is the number of seconds the slide will be show before moving on.
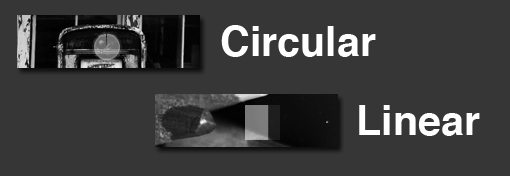
So if we wanted a circular timer, a two second duration, with a size of 50px and a color of blue, we would use the following code:
Customizing Slides
Adding extra slides is super easy. Just go to the slides section and copy and paste a portion the portion of code between the slide tags and change the image name to the name of your jpg.If you wanted to place an image called sunrise.jpg, the code would look like this:
Adding Links to Slides
Use the following snippet to add a link so that when a user clicks on a slide, the link is opened (replace the link with your own).Adding Descriptions to Slides
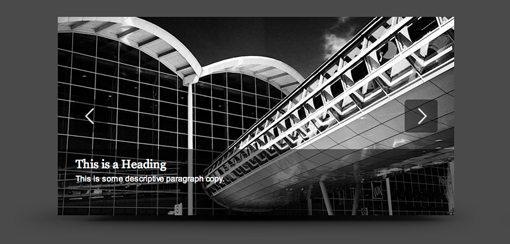
Cu3er gives you the ability to add both a heading and a paragraph to each slide. This description can optionally have an associated link that is different than the link attached to the slide.The code snippet to accomplish this comes right after the slide url.
This will yield a result similar to the one below.
Customizing the Description Box
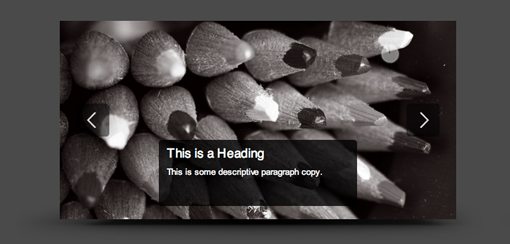
To customize the description settings, insert the following code into the settings area and tweak it to your own preferences.Here you can assign fonts, text size, text color and text margin for both the heading and the paragraph. The tween information allows you to position the box holding the text as well as decide its height, color and animation properties. Since my slides are 600px wide, I set my x value and my width so that x times two plus width is equal to 600 (150*2+300) to center the description horizontally on the slide.
These setting give me the following results:
Defining the 3D Transition
The final customizable attribute we’ll go over is the most fun: the 3D transitions. Cu3er gives you complete control over the nature of these transitions. To illustrate, let’s look at the following code:As you can see, here we’ve placed some transition attributes in between two slides. First we tell Cu3er how many slices we want in the transition. This can be any number you want, just keep in mind the animation starts to get choppy around 30. You can also decide if you want to slice the image vertically or horizontally. If vertically, you choose whether you want the direction to be up or down. If horizontally, you choose a left or right direction.

You can also set the cube color (0x333333), duration (in seconds), and delay (in seconds) for each transition. Just remember to always place the transition properties between two slides and not within a slide.
Conclusion
Hopefully, you can now easily throw a Cu3er slideshow into a web page and customize most of its settings. For further information on tweaking the slideshow, be sure to stop by the documentation page.Cu3er is quite the hot item and is used in a number of top selling themes on ThemeForest. Working it into your portfolio of offerings is a great and simple way to wow potential clients.
Let us know if there are any other plugins or shiny web toys you’d like to see us go over. We’re always looking for cool new technologies to learn and share!

EmoticonEmoticon